For week 2 of our series on guided threat hunting, we will be reviewing a hunting technique to uncover malware posing as images within an organization’s infrastructure. We got this idea from past experiences looking at Emotet samples. The basic idea behind this hunt is to look for HTTP content that presents itself as an image (with a png, gif, jpeg extension, for example), but the actual downloaded or transferred file is an executable.
Stamus Security Platform (SSP) enables security practitioners to detect threats on their organization’s networks faster and respond sooner by providing them with automated threat detection tools. The system analyzes network traffic and automatically identifies traffic that is anomalous, potentially harmful, or downright malicious and logs an event (aka, an “alert”) for each.
The most serious, imminent threats are escalated with high confidence into Declarations of Compromise™(DoC) for which the system presents the most relevant details and context for the analyst so they can act quickly and confidently.
Over the course of a week, there might be over a million alerts, but DoC events are much more rare, and should be addressed immediately. So, what happens to all the other events that aren’t considered “serious and imminent”?
For organizations that take a proactive approach to their network defense, these alerts can be a valuable source of data used by threat hunting teams to search for anomalous activity, specific threats, and suspicious behavior. It’s for these teams that the SSP Enriched Hunting interface was designed.
Enriched Hunting provides the threat hunter with over one hundred ready-to-use guided hunting filters, giving them a good starting place to begin their hunt. Using this interface, analysts can investigate, classify, escalate, and automate vast amounts of event data, alerts, and contextual metadata captured by Stamus Security Platform. Check out the first article in this series to read an introduction to guided threat hunting.
How Does Malware Appear to be an Image File?
When opened, executable files execute code or another series of instructions. A typical image file – in PNG, JPEG or GIF format, for example – is a static file designed to render an image for viewing on the system in which it is opened. Malware can masquerade as an image file using the .png, .jpeg, or .gif extensions, but the file itself executes code or installs malicious software when it is opened. In some cases, the code is not executed until later on when other malware that is already present on the system performs an action.
These "images" can originate from various sources, but they are most often downloaded from the internet or sent in phishing emails. They can be harmful because the executable code often serves as a way for attackers to gain access into the network to install malware, ransomware, trojans, or other harmful software. This method of deployment is very sneaky and easily missed by users, as the image file names themselves do not look harmful on the surface.
Identifying Malware Masquerading as Image Files Using Stamus Security Platform
The Stamus Enriched Hunting interface provides a filter that guides hunters to find this exact type of activity within their organization’s infrastructure using insights gathered from the network. Let’s take a look at an example:
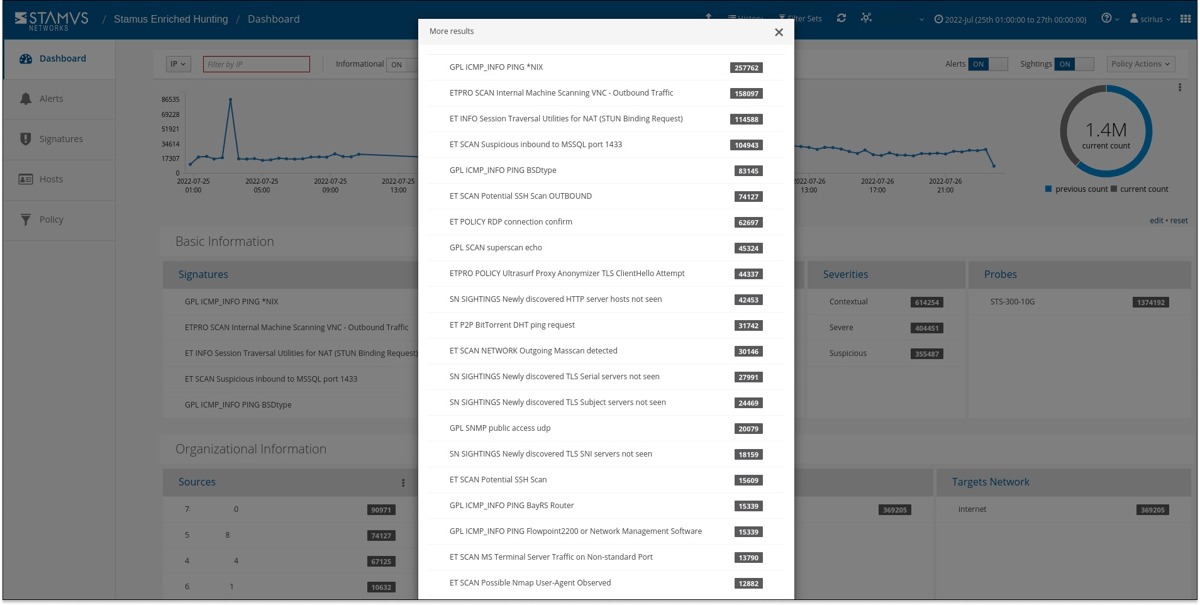
In the past 48 hours, we have had about 1.4M alert events which have triggered hundreds of thousands of results.
The Hunt for Malware Masquerading as an Image File
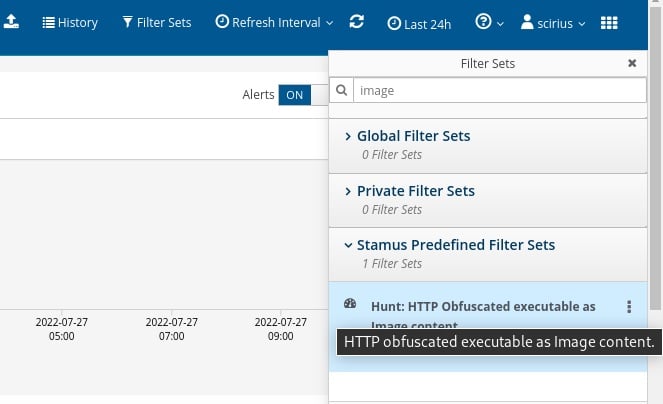
Let’s look for results based on our ideas. As mentioned earlier, we decided to search for executable files presented as images based on Emotet samples we saw previously. We have access to over 100 guided hunting filters, so we first need to find the correct filter to fit our needs. For this example, we can search for words like “executable” or “image” from our filter selection drop down. Then we select the filter titled “Hunt: HTTP Obfuscated executable as image content”.
This takes the results from 1.4 million alerts down to just 1 in the last 24 hours. This is a very good find.
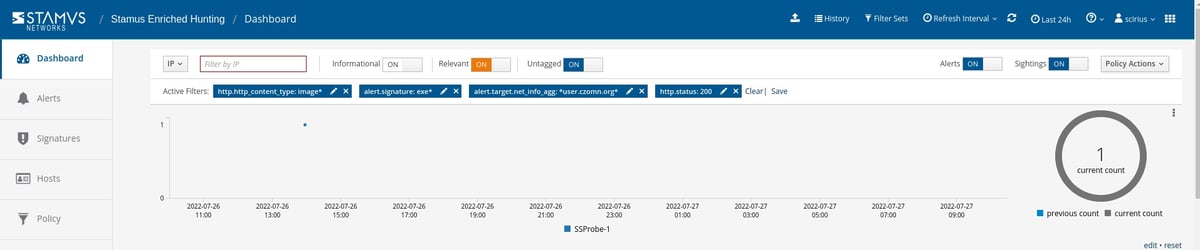
It is important to note that SSP enriched hunting also provides additional organization-specific context. Users can filter for queries from various departments or user groups within the organization, allowing them to hyper-focus on specific areas without having to aggregate events or organize IP addresses to find specific users or departments.

Evidence for the Incident Response
With a few clicks we are able to review two important types of evidence:
- The network protocol transactions
- Host Insights
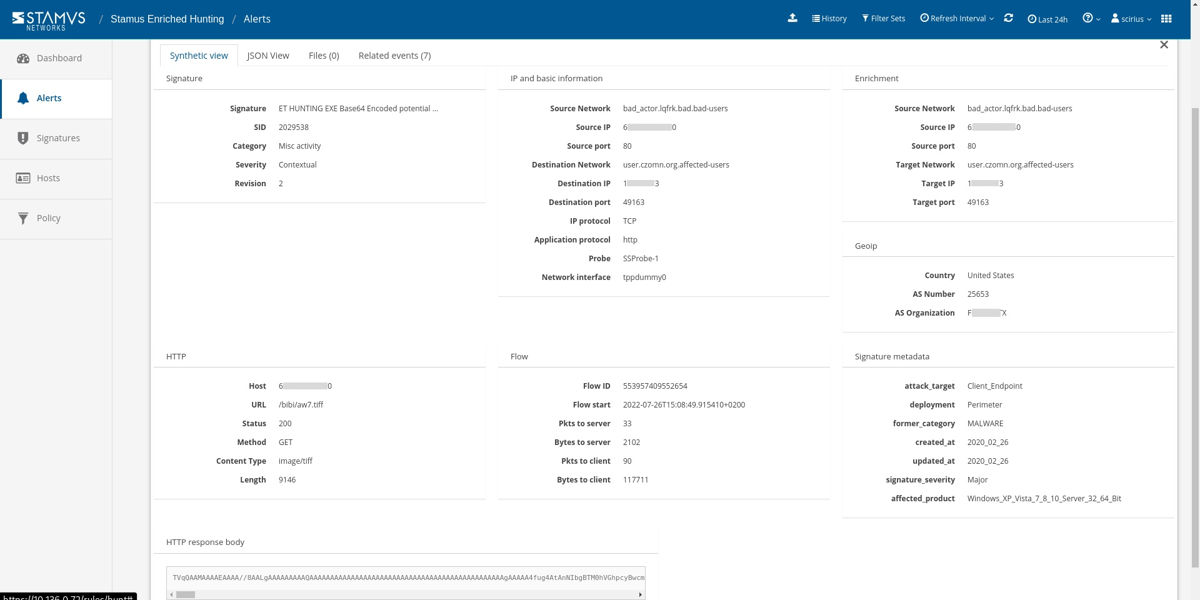
SSP enriched this event with important metadata like http user agent, http host, request body, status code, and content type allowing us to quickly recognize that it was advertised as an image. Under the HTTP header below, we can see that the content type is registered as “image/tiff”, but the HTTP Response body shows that the file is actually Base64-encoded executable content.
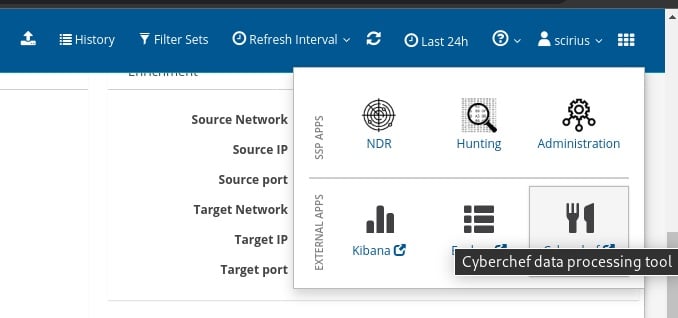
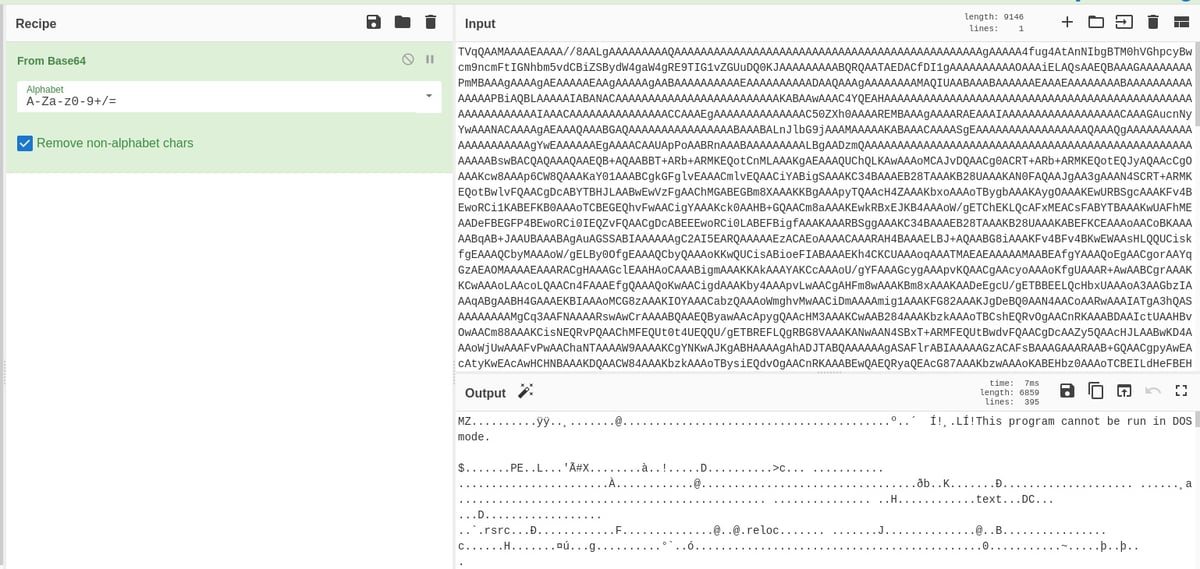
The great news is that we are able to decode the HTTP response body directly inside the Stamus Security Platform using the Cyberchef integration.
All we have to do is paste the Base64 body from the screenshot above. We can tell that this is a base 64-encoded executable because the file body starts with, “MZ…..! This program cannot be run in DOS…”. In other words, we have a file that advertises itself as an image tiff file, but in reality will be downloaded, decoded, and then executed by the malware.
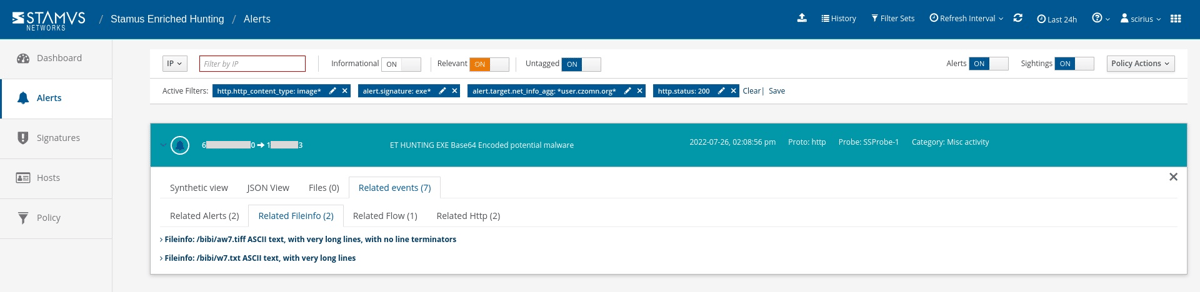
Using this information, we can look deeper into the associated network protocol transactions and connection log evidence. In this example, we can review the file transactions and related http logs. We can also pivot on the md5 or sha25sum of that transaction to see if it appeared anywhere else on the network.

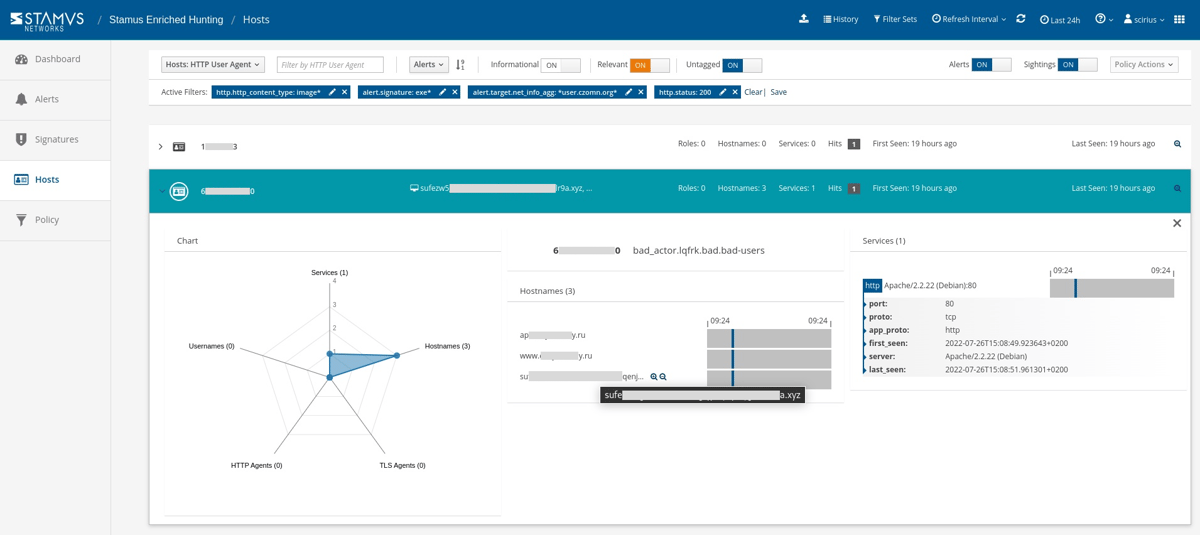
It’s important to know who the client and offending hosts are and if there is additional information about those seen on the network. Specifically, we need to see which services are running on the offender’s host.
By clicking the “Hosts” tab on the left hand side panel we are transferred from the actual events log to the Host Insights screen - a very powerful Stamus Security Platform feature. This screen gives us all the critical information we were looking for. In this case, it appears that the offender is running an Apache web service and is associated with some very suspicious-looking hostnames.
Armed with the above information and evidence, a threat hunter has enough information to generate an Incident Response ticket. However, there are still two tasks left to complete:
- 1. We do not want to have to repeat this exact same process again in the future, so we need to set up classification and auto-escalation for future occurrences.
- 2. If anything like this has happened before, we want it to be found and escalated with all the associated evidence - all based on historical data.
Escalation and Automation of this Threat Hunt
So let's first set up automation for any past or future occurrences.
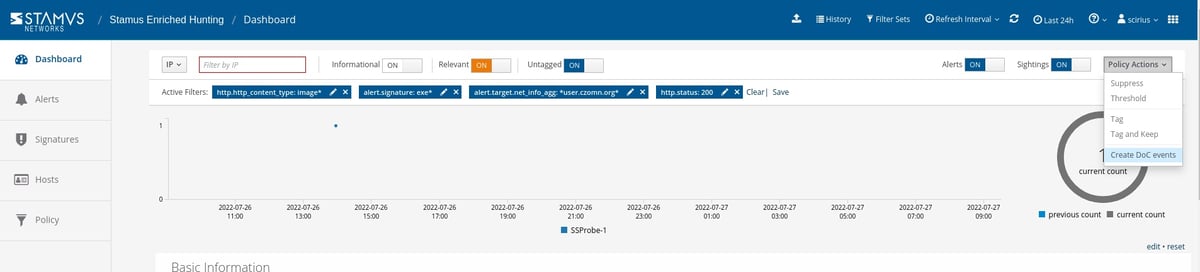
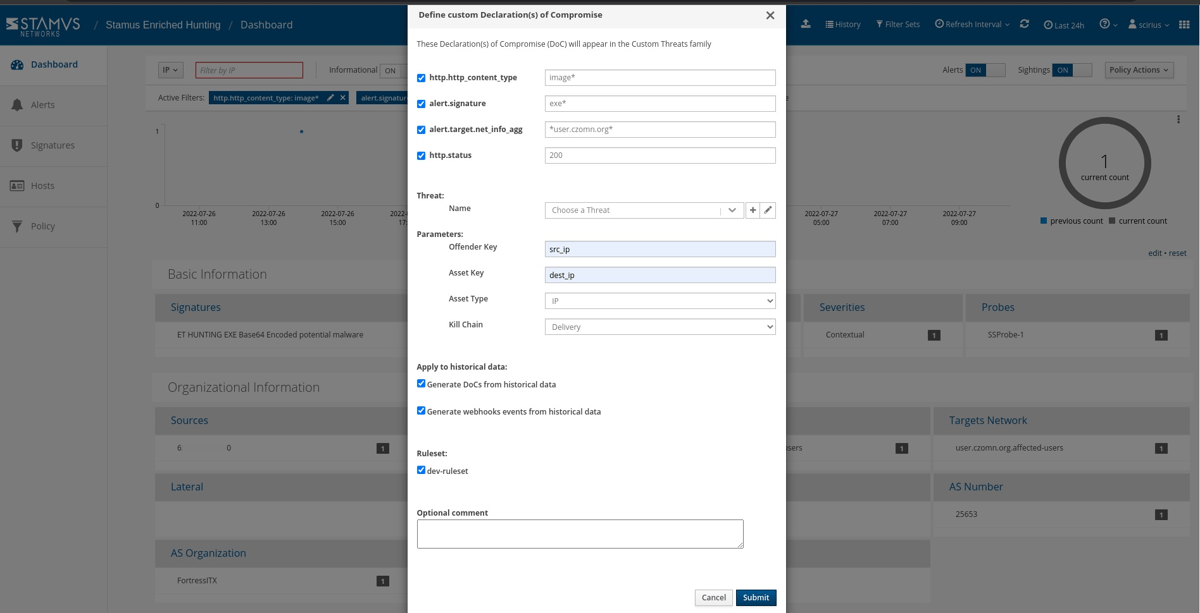
For that, we can simply create a Declaration of Compromise event from the policy drop down menu on the right hand side panel in Stamus Enriched Hunting.
The next step is to add some explanation about the type of threat. This also gives us a chance to provide informational context and helps convey knowledge to colleagues.
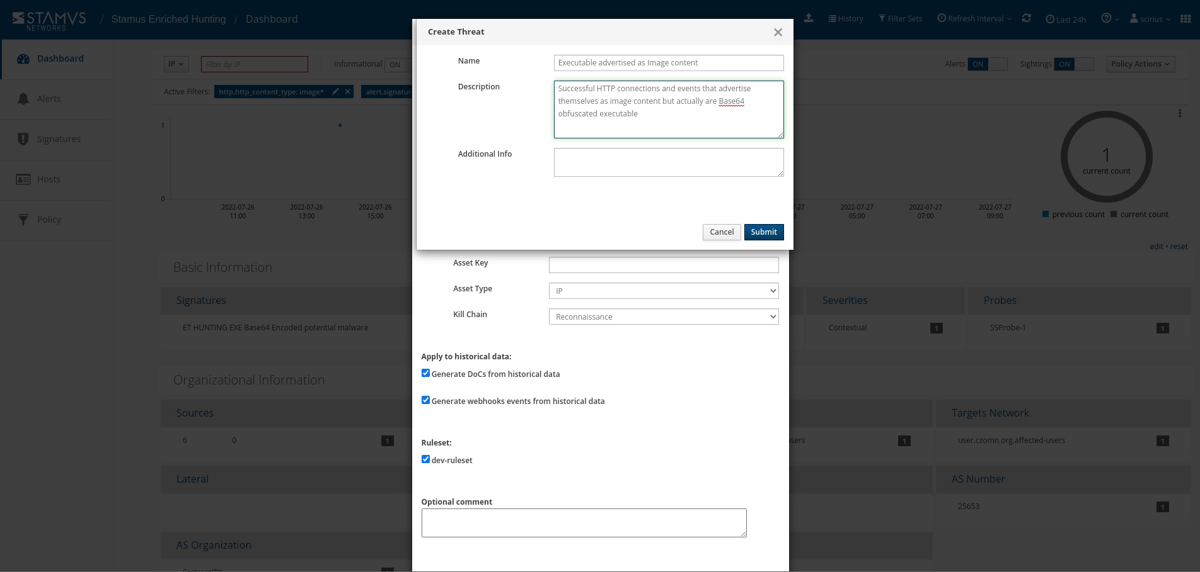
Select options to generate events from historical data and generate Webhook notifications.

Just like that, the hunt and all related activities are complete. Any past or future generated events from that automation will then be further auto-classified and escalated to the desired response process - via SOAR playbook, chat notification, or incident response ticket.
Conclusion
The post-hunt activities completed in this example are just the tip of the iceberg when it comes to the automation and escalation capabilities of Stamus Security Platform. To learn more about these features and how to implement them, read our article titled “After the Hunt”.
To learn more about Network Detection and Response (NDR) from Stamus Networks and see the enriched hunting interface for yourself, click the button below and schedule a live demo.